Table of Contents
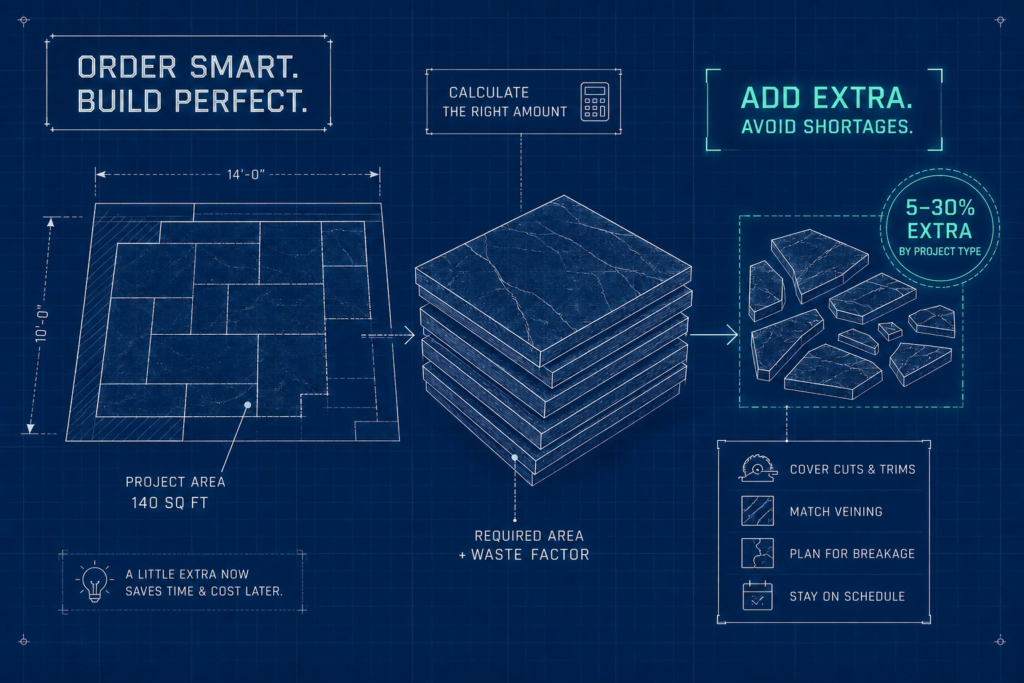
For natural stone tile installation, the waste factor usually falls between 10% and 20%: use 10% for straight, simple layouts, and plan on 15% to 20% for diagonal patterns, curved borders, random layouts, or tight joints that require more cutting and fitting. Running out of flagstone three-quarters through a patio isn’t bad luck, it’s a skipped number. The waste factor for stone projects is the overage percentage you apply to your net area before calling your supplier, and getting it wrong can cost you two days of downtime, an extra delivery charge, and a color-batch mismatch baked into your finished surface.
Built for DIY homeowners, landscaping enthusiasts, small contractors, and property owners planning stone or gravel work, this guide breaks down waste factors by material type, shows the formula for adding 10%, 15%, or 20%, walks through worked examples you can copy, and explains how to convert square feet into the cubic yards or tons your supplier actually quotes. Use it to avoid ordering short, overbuying, or getting stuck with mismatched batches and wasted material when the job should be finishing on time and on budget.
What the overage percentage is actually accounting for
When you measure your project, you get a net area: the finished surface you want to cover. That number is accurate. It is also useless on its own for placing a supplier order, because ordering only the exact square footage is risky and can lead to shortages; the material you buy and the material that ends up in your finished surface are never the same quantity, and running short can delay the job and make it harder to keep a consistent look if you need a second batch. Ordering the full requirement at once also helps prevent shade or veining differences in the finished floor.
The gap between them has several sources. Cut-offs at borders and edges account for the biggest share. Every time you trim a piece to fit a perimeter, one side of that cut becomes usable stone and the other side becomes scrap. Pieces rejected for color inconsistency, grain direction, or the need to select natural stone tiles for consistent veining and color go the same way. On straightforward installations, installation cuts and breakage alone may account for roughly 1-3% of material, though the actual amount varies with stone type, layout, handling, and cutting methods.
Add in breakage during transport, chips from handling, and the natural give-and-take of fitting irregular shapes, and waste occurs fast. None of this is carelessness. It is the expected physics of working with stone on a real job site.
Stone behaves differently from other building materials in one critical way: you cannot splice two cut pieces back together. Natural stone is more brittle and prone to natural fracturing than ceramic or porcelain. A cracked flagstone is gone. A veneer corner piece with the wrong grain direction is gone. This is why stone overage percentages run higher than materials like vinyl flooring or drywall, and why getting the number right before you order is worth the five minutes it takes. Natural stone tiles require careful planning and often a higher waste factor because of natural variation. This article gives you a practical way to calculate material needs for a stone project before you place that order.
| Stone type | Typical overage | When to increase |
|---|---|---|
| Crushed stone, gravel, aggregate | 5-15% | Irregular terrain, slopes, multiple inside corners |
| Concrete pavers and flagstone | 10-20% | Diagonal patterns, curved borders, random layouts |
| Natural stone veneer and wall stone | 10-20% | Tight joints, inside corners, window returns, door jambs |
| Stone slab countertops | 15-20% | Islands, L-shapes, mitered bar overhangs |
Crushed stone, gravel, and aggregate: 5-15%
Crushed stone is a bulk material. There is no cutting, no pattern-matching, and no color rejection. The overage here accounts for two things: compaction settling (angular stone locks together and reduces in volume under a compactor) and the small amount of material that shifts outside your defined area during installation. A standard 10% works for most simple rectangular or circular projects, helping you order enough material without overbuying. Push that toward 15% for highly irregular terrain, pronounced slopes, or areas with multiple inside corners where stone tends to spill during placement.
For driveways specifically, compaction is a real planning factor, especially with dense base materials such as crusher run or road base. Loose dense-graded material can reduce in volume as it is compacted, while clean stones like #57 settle and interlock differently. Because compaction varies by material, moisture, gradation, and equipment, a 10–15% ordering allowance can be a practical starting point for many driveway and base-layer estimates, but it should not be treated as a universal compaction factor. When you use Crushed Stone Calculator, the built-in 10% waste factor provides a planning allowance and can be increased for rougher terrain directly in the interface. For a broader overview of waste-factor methodology see the waste factor guide.
Concrete pavers and flagstone: 10-20%
Pavers, flagstone, and stone tiles occupy the middle of the range. For a tile installation in simple rectangular rooms, a straight layout typically needs about 10% extra tiles. Most standard paver or stone tile projects should include about 10-15% extra tile. Add diagonal layouts or a curved border and you’re looking at about 15% extra, because those details require more cutting, and more corners and angles in the room layout increase tile waste.
Flagstone in a random-pattern layout typically runs 15-20% due to shape-fitting rejects, since you’re constantly checking each piece for the right silhouette to fill a gap; planning the layout before cutting helps reduce waste, and reusable offcuts are best saved for less visible areas.
Natural stone veneer and wall stone: 10-20%
Natural stone veneer waste depends on the stone profile, joint style, and layout complexity. Standard installations often use about 10-15% extra material, while projects with more cuts, corners, or tighter joints may move toward 15-20%. Tight-joint or dry-stack installations can require 20-30% depending on the amount of trimming and fitting. More intricate layouts usually need extra overage because the installation process involves more fitting and adjustment. Corners deserve a separate line item entirely.
Many veneer suppliers estimate corner pieces by linear foot, often using a conversion such as 0.75 square feet of coverage per linear foot of corner, and the same estimating logic can differ somewhat from manufactured stone veneer. Calculate corners separately from flat field stone so you do not under-order the pieces that finish outside edges. Keeping a little extra material from the same lot, including spare tiles or matching tiles, can also help with future repairs and preserve a consistent look. Budget for corners by linear foot, not by square foot, and apply any additional corner allowance recommended by your supplier or estimator.
Stone slab countertops: 15-20%
Countertop slab waste is driven by the template, not the raw square footage. Sink cutouts, cooktop openings, corner notches for appliances, and seam placement can create complex layouts and complex shapes that consume more slab area than the finished kitchen shows. Fifteen percent is a solid baseline for a straightforward counter run. Complex kitchens with islands, L-shapes, or bar overhangs with mitered edges should plan for 20%, and these templates often require careful planning to avoid ordering errors.
What drives your overage percentage higher
Pattern complexity and layout angle
A straight-set layout is the lowest-waste option and generates minimal waste compared with other layout patterns. Rotate that same paver pattern 45 degrees and your overage can move toward the higher end of the range because diagonal layouts increase cutting requirements and waste, so adding for that is standard practice. A herringbone pattern is one of several complex patterns, and this kind of layout complexity often means more cutting; many projects may need around 15-20% extra material, while especially cut-intensive layouts can require more. Projects with many cuts need enough material so the design can be completed without coming up short, and some intricate designs may justify an allowance above 20% depending on the room shape, tile format, and layout.
Irregular shapes and tight joints
Curved garden paths, circular patios, and complex shapes with multiple inside corners all require custom cuts that yield small, unusable off-cuts. Each niche or notch around a post, column, or step edge is an individual cut that produces scrap. Irregular room shape details such as bay windows, curved walls, or angled walls also increase cuts and layout waste. Tight joints under 1/4 inch also increase waste, because there is no tolerance for fit and they often require more trimming.
A piece that is even slightly oversize gets trimmed, and the trim goes in the bin. For tight-joint conditions, use the higher end of the waste range appropriate for your material and pattern to reduce the risk of running short, rather than automatically adding a separate 10-20% allowance on top. In irregular spaces, a higher waste percentage adds planning complexity but lowers the risk of shortages.
On-site breakage and long-distance delivery
Breakage during unloading, stacking, and cutting is real, especially with thin stone veneer and large-format flagstone, so fragile materials should stay toward the higher end of the recommended overage range. Long-distance shipping, repeated handling, and poor storage can push the project toward the higher end of the recommended overage range, so store tiles properly before installation to prevent breakage, especially in areas with higher foot traffic. Proper stacking on edge rather than flat, and keeping material dry and covered, helps limit minor chips and broken pieces from handling.
Some pieces can sometimes be trimmed for less visible areas, but you should not rely on that for visible sections. You should still factor it into your order rather than assuming perfect handling from quarry to finished surface. For specific guidance on thin stone installations, see how to calculate the expected waste factor for thin stone installations.
Waste factor for stone projects: formula to turn net area into an order quantity
One formula for every stone type
The math is straightforward once you have your overage percentage. Measure the room area accurately by multiplying length and width to get the total square footage and determine your tile quantity before applying the formula. Apply this formula regardless of stone type or unit:
Order Quantity = Net Area × (1 + Waste Factor)
This is the total tile calculation method and the simplest way to get an accurate estimate. If your net area is 300 sq ft and your overage is 10%, your order quantity is 300 × 1.10 = 330 sq ft. Most projects need 10-15% extra tile for waste. For natural stone, the waste percentage should reflect the tile format, layout, and installer experience. That is the number you bring to your supplier, not 300, because the installation process usually requires more than the net figure.
The formula works whether your final unit is square feet, cubic yards, or tons. Calculate your net quantity first, apply the overage factor, then round up to the supplier’s selling unit, such as full pallets, cubic yards, or tons.
Worked example 1: paver patio, straight layout, 10% overage
Net area: 300 sq ft for the patio installation area. In plain terms, that is 300 square feet to cover. For this stone project, accurate measurements keep the estimate on track. Layout: straight rectangular pattern, no diagonal cuts. Overage: 10%. Order quantity: 300 × 1.10 = 330 sq ft. To convert that to pallets, divide by your supplier’s coverage spec. Pallet coverage for residential pavers varies by product, so use your supplier’s stated coverage. For example, at 50 sq ft per pallet: 330 ÷ 50 = 6.6 pallets. Round up to 7. That is your supplier order.
Worked example 2: natural stone veneer wall, 20% overage
Net wall area: 200 sq ft (measured after subtracting window and door openings). Conditions: medium joints and 12 linear feet of outside corner runs. Planned overage for flat stone: 20%. Each linear foot of corner stone covers approximately 0.75 sq ft of wall area, so 12 linear feet covers about 9 sq ft. Subtract that corner coverage from the wall area first: 200 − 9 = 191 sq ft of flat stone before waste. Apply the 20% overage to the flats: 191 × 1.20 = 229.2 sq ft. Order the 12 linear feet of corner product separately, then apply any corner waste allowance recommended by your supplier or estimator.
These remain two separate line items. The waste factor also affects project efficiency and scheduling, especially when replacement stone may be harder to match.
From square feet to the unit your supplier quotes
Converting to cubic yards and tons for bulk stone
Crushed stone, gravel, and aggregate suppliers sell by the cubic yard or ton, not by the square foot. The conversion requires one additional input: depth. Volume in cubic feet equals square feet multiplied by depth in feet (convert inches first: 4 inches = 0.33 ft). Cubic yards equal cubic feet divided by 27. As a quick reference, one cubic yard covers 81 sq ft at 4 inches deep, 108 sq ft at 3 inches, and 162 sq ft at 2 inches.
To convert cubic yards to tons, multiply by a material-specific density factor. Coarse gravel and limestone run approximately 1.35-1.65 tons per cubic yard. Pea gravel sits toward the lower end; traprock and dense granite sit higher. Apply your waste factor before final rounding, so your supplier order reflects the full project quantity instead of only the net area. The biggest difference usually comes when you round up to full pallets, cubic yards, or tons. For a detailed walkthrough, see Cubic Yards vs Tons Explained: A Simple Guide and use the external cubic yards to tons converter if you need a quick numeric check.
Coverage factors to know before calling your supplier
Flagstone at 2 inches thick covers roughly 65-120 sq ft per ton, depending on stone density and regional variation. Always confirm the exact figure with your local supplier before finalizing your order. Crushed stone at 3/4 inch, laid 4 inches deep, covers approximately 80 sq ft per cubic yard. These figures shift with thickness, stone type, moisture, and regional material density. If your supplier quotes by weight, try a quick tonnage calculator to sanity-check cubic-yard proposals.
Using Crushed Stone Calculator for aggregate jobs
For any project involving crushed stone, gravel, or aggregate, Crushed Stone Calculator handles the full chain automatically: area input, depth, material-specific density preset, built-in 10% overage (adjustable upward for irregular terrain), and output in cubic yards, tons, cubic feet, and a cost estimate if you supply a local price per ton. This removes the unit conversion steps entirely and gives you a supplier-ready number you can read off the screen. For natural stone veneer or pavers, use the formula from the previous section manually, then take your square footage total to your supplier for their pallet or ton conversion. Learn more on our About Us page.
Order right the first time
Getting the waste factor for stone projects right is not about being overly cautious. It is about understanding how stone actually behaves during installation and ordering to match reality, which is why careful planning and knowing how much tile to order keeps most jobs within the usual overage ranges, while higher allowances help you avoid running short. Crushed stone and aggregate need 5-15% depending on terrain. Pavers and flagstone need 10-20% based on pattern complexity.
Natural veneer walls often need about 10-15% extra for standard installations, while more complex layouts may require 15-20% and tight-joint or dry-stack work can reach 20-30%; corners should be budgeted as a separate line item. For natural stone tile, 10-15% is a common starting range, with more complex patterns or greater material variation sometimes requiring more.
The formula is the same for every project: net area multiplied by one plus your overage factor. Apply the waste factor for stone projects before final rounding to your supplier’s selling unit. Round up to the nearest full pallet, cubic yard, or ton. That single step, done before you place the call, is the difference between a job that finishes cleanly and one that stalls while you wait for a restock and hope the new batch matches, especially when deciding how much extra tile to add for cuts, breakage, and future repairs.
Return policies at natural stone suppliers are not forgiving. Restocking fees, return windows, and rules for partial pallets or special orders vary widely by supplier. Ordering accurately the first time isn’t just about avoiding delays; it helps avoid costly mistakes, save money, and protects your budget from fees that can easily outstrip the cost of the extra material itself. Check supplier return policy details before you order. Get the number right once, and the job finishes on your terms. See our Disclaimer.
Pingback: French Drain Gravel: Right Type, Size & How Much to Order
Pingback: Estimate Landscape Rock Fast: Calculator, Density, 3 Examples
Pingback: Order Right First Time: How Much Gravel You Need, Plus 10–15% Waste